The definitive guide to java backend developer career path
Would you like to become a Java backend developer but you are overwhelmed with the number of resources on the internet? I feel your pain because I faced the same issue some time ago. In the past, the problem was that there were too few resources to learn new things. Right now it’s some kind of the opposite where there are too many resources and it’s hard to decide which one to choose. I see that people often ask what to learn and in which order. I also receive questions from my colleagues who are interested in learning all this stuff but don’t know what is necessary and what might be skipped.
Based on my own learning experience I would like to present to you how java backend developer career path might look like. I’m talking here about what you have to learn to become an employable junior java developer in “simple” three parts. I think that to succeed you need to have a clear path, then you will be more motivated and will not quit so easily. Apart from telling you what, I would also like to tell you the why, which I think is equally important. Sometimes I will briefly describe some topics on a high level but remember that it is your job to search for more information about each one and then learn it. Here you will only find what, why, and in what order. For some topics, I will give you links and recommendations but generally, you should do your research on each subject.
TLDR:
PART 1:
- core Java
- web concepts: HTTP protocol and basics of HTML, JavaScript, CSS
- Maven
- MVC Pattern, Servlets, Thymeleaf/JSP
- MySQL/Postgres
- JDBC
- Write 1st app (Servlets + JDBC + MySql/Postgres + JSP/Thymleaf)
PART 2:
- JPA, ORM, Hibernate
- Spring
- Write 2nd app (Spring Boot + Hibernate/Spring Data + MySQL/Postgres + Thymeleaf/JSP)
PART 3:
- Design Patterns and Data Structures
- Theory of tests, JUnit, Mockito
- Messaging systems, topics, queues, JMS, ActiveMQ/RabbitMQ
- Websockets, STOMP
- REST API concepts
- Consuming external APIs
- Write 3rd app (REST API + all learned technologies)
Part 1
1.1 Core Java
Learning Java is of course the first step. You need to learn java’s syntax, available data types, control flow (loops, if-statements), understand OOP concept, know what inheritance and polymorphism mean, know what a class is and how it differs from an instance. Generally all basic stuff. For this step you will find tons of resources, there are many books and courses online which teach just core Java. Depending on what you prefer you can choose a book, online video course, or written online course. After you complete this step you will not be able to build anything meaningful yet, you will just know java’s syntax and OOP concepts. Below you can find some recommendations to learn core Java, remember that it’s enough to pick only one of these:
Mooc.fi
Throughout my career, I’ve seen many materials to learn core java and there is one that I think stands out from others, it is Mooc.fi Java course. Why I like Mooc.fi so much is the fact that you have code assignments in there. But those assignments are some kind of special, they use testmycode. They don’t test how your code looks but what your program will output for a given input.
Below I will describe Exercise 8 “Adder” from week 1 to show you what I mean. Here you have to write a program which will ask user for two numbers and will print sum of them. Here is an example valid solution to this exercise that you can submit and will be approved:
public class Adder {
    public static void main(String[] args) {
        Scanner reader = new Scanner(System.in);
        System.out.print("Type a number: ");
        int number1 = Integer.parseInt(reader.nextLine());
        System.out.print("Type another number: ");
        int number2 = Integer.parseInt(reader.nextLine());
        int result = number1 + number2;
        System.out.print("Sum of the numbers: " + result);
    }
}
A naive testing solution (and trust me that I’ve seen such courses!) would just check if your source code is 1:1 with what they think is the ideal solution. But in this course, you just need to make sure that you will ask the user two times for a number and that you will print the sum of these numbers. It doesn’t matter if you will choose number1 for a variable name or firstNumber for the second variable, all that matters is that you will ask for two numbers and print the correct output. Below I presented a different solution that differs from the first example but which would also be accepted!
public class Adder {
    public static void main(String[] args) {
        String msg1 = "Type a number: ";
        String msg2 = "Type another number: ";
        String msg3 = "Sum of the numbers: %i";
        Scanner reader = new Scanner(System.in);
        System.out.print(msg1);
        int firstNumber = Integer.parseInt(reader.nextLine());
        System.out.print(msg2);
        int secondNumber = Integer.parseInt(reader.nextLine());
        System.out.print(String.format(msg3,firstNumber+secondNumber));
    }
}
This creates a very good user experience and encourages you to write your own code which is the most important thing. I read many books and there are often assignments at the end of each chapter. I usually skipped them just to find myself at the end knowing nothing. Here you are forced to complete them before you can see the next chapter. This was the first course in which I made all assignments and I think that this is the biggest advantage of this course. I highly recommend doing it.
Books
Many books teach core Java. You can find many recommendations and discussions on the Internet. I will give you three examples that I think are worth to check, and all of them teach just core Java: Head First Java, 2nd Edition, Core Java Volume I – Fundamentals, Java: A Beginner’s Guide
Video courses
If you prefer video courses more than books you can check platforms like Udemy, Pluralsight, or Coursera. I don’t want to recommend any particular course because I didn’t complete any of those. One thing that I want to tell you though is that you should try to find a course which teaches Core Java only and avoid all these “all in one” courses which claim to teach you everything in 20 hours because that is impossible. At this stage, you probably still don’t know what you will use Java for so it’s not a good idea to specialize in something. You should learn basics first which are common to all java developer career paths.
1.2 Choose your path
After you know core Java you should be aware that with core Java you will be not able to do many things. You need to specialize in something. You need to understand that it was just a first step :) At this stage, you can probably write some ugly java console applications that are not too useful to anyone! Now you have to choose what will be your specialization. I think that there are three main paths for java devs.
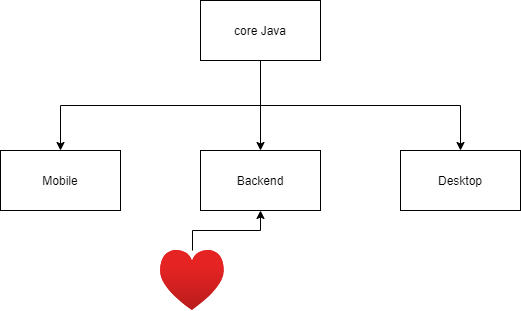
Backend
Here you will be writing applications that run on a server (not on the client’s computer) and take care of all things which are not visible to the client. You will have to take care of authentication, connection to a database, business logic, caching, etc. and usually return raw data. If you don’t like styling things, thinking about UX and playing with CSS then this is a good path for you. When it comes to the job market this field at the moment has the most job offers and is also the most popular choice among Java developers.
Mobile
If you are interested in mobile apps then you should jump straight to some Android ecosystem courses. For mobile android developers there is also quite a lot of job offers but for sure not as much as for backend devs. You have to also be aware of the fact that Google switched to Kotlin as their default language so Java soon might not be as popular among mobile devs as it is now.
Desktop
Desktop apps are these kinds of apps that are running on the client’s computer and are consuming the client’s computing power. Today these applications are not so popular as they used to be. In the past, you usually had to download some executable file from the Internet and run this on your computer. Today it changed and most apps are web applications and you access them through a web browser. If you are interested in desktop apps you should learn things like JavaFX or Swing, otherwise, you can skip chapters that teach these frameworks cause you will not use them as a backend developer. Unless you have specific needs I would avoid this path as with the cloud being more and more popular almost everything now is a web app and desktop apps in java will be usually some kind of legacy stuff.
I mentioned mobile and desktop just to let you know what are the other choices. I personally chose the backend path and this is the only path that I feel strong enough to describe here. If you feel that mobile or desktop is more interesting than you should probably look for some other guide cause this guide will not cover it. However, I hope that you also found backend to be the most interesting and will continue reading this post!
1.3 Web dev basics
Many newcomers don’t even understand basic concepts before they start their learning journey. They know that there is something like backend and frontend and they know that backend is all that is not visible on sites and frontend is all that how it looks. They don’t know what is HTTP request or what is a static website and what they do after learning core Java is that they learn Spring Boot. Please, don’t be this kind of guy!
HTML, CSS, JavaScript
Before you start anything in web development you should know the basics of these three, and when I say basics I mean it. Try to find any crash course for each of these three. After that, you should know what to put under meta tag, what is div, how to add color to text with CSS, and maybe how to put a button on your site which will show a popup window with some text after the user clicks it. That will be enough.
Static sites
Before you start creating web applications in Java I highly recommend first trying to create a simple static website. This will teach you the basics of HTML, JavaScript, and CSS which I think are also necessary for every serious Java developer. I’m not talking about some fancy advanced stuff, try to create a simple single html file like ‘Blog’ with two example entries, and try to make it public. If you are completely new to web development that might be difficult for you but at the same time you will learn a lot of things such as how to connect to your server to put your static files, how to setup domain and point it to your server and many more which you will find out yourself along the way. Here are high-level steps that people who don’t have any web dev experience should try first:
- create a simple HTML file with some CSS styling. That might be your blog with some two example entries inside <ul> and <li> tags like like ‘Post 1’ and ‘Post 2’
- run it locally on your computer and see how it looks
- create some web hosting account and obtain connection string: username, password, and FTP address
- use some FTP client like TotalCommander and connect to your server
- send files from your computer to the server
- create a custom domain and point it to your server
Now you have created and published a static website. What does it mean that it is static? It means that the index.html file that you placed on your server contains all information, it is complete and ready to be rendered in your web browser. When you will type your URL in the web browser it will connect to the webserver on which you placed your files and all that this webserver will have to do is that it will just return this file. That’s it!
Static sites vs dynamic sites
Now you have a working static site, that’s awesome! Static sites have many advantages and these kinds of sites were very popular at the beginning of the Internet boom. The main advantage is that these sites are very fast. Could you guess why? I’m pretty sure you can. It’s because all that is needed (in this case content of your blog) is already present in that HTML file, you didn’t need any database where you store your records and didn’t have to write a single line of code in server-side language like java. But what is the disadvantage? It is the fact the when you will want to add a new, third entry to your blog post you will have to repeat the whole process. You will have to edit your index.html locally and send it to your server so your visitor could see new content. What if you would like to allow other people to comment on your blog? With static sites that would be impossible (unless your visitors have access to your server and can modify your index.html file or you use some fancy js apps like Discuss). That’s why dynamic sites came into play. These kinds of sites allow you to have dynamic content. And if we want to convert our simple static blog site to a dynamic site we have to use one of the server-side programming languages, like Java, PHP, python. Of course, we will choose Java :)
1.4 Dynamic sites in Java
So what does it mean to convert static site to dynamic site? It means that you will no longer have ready files like index.html with all content in it placed on your web server waiting for requests. Now when a new request will hit your server, that server will ask your Java application “hey! I received a new request, please prepare an appropriate HTML file for this request and give it to me”. That gives us a lot of possibilities. You can now have some database in which you will be storing all blog posts, when new requests will arrive then your application will connect to DB, read all posts, prepare an HTML file, and return it to a web browser. That’s why we call it dynamic.
MVC pattern
There are many ways to write an application that will return different HTML files depending on what the request is. Things get complicated when your project is getting bigger and bigger. You can end up with a big, hard to maintain project which no one apart from you knowing how it works. That’s why software engineers invented some pattern to this common task called the MVC pattern. The main purpose of it is to distinguish three layers in your application: Model, View, and Controller.
This pattern is present in most server-side programming languages. The main idea is that you separate data like blog posts (model) from view (HTML files) and have a controller that puts all these things together and outputs HTML files. Our static site had hard-coded blog posts in its HTML file. Here we will have a view template in which we will say how the main page of our blog should look like but those files will not contain any data in them (like blog posts content). So now you know that in our dynamic Java application we will have to write controller, model, and view.
Model - It describes how your data looks like. It is a java class with all attributes that you will need, for our blog site we will need probably BlogPost.class and this class will be passed to the View layer by the Controller.
View - We will need many different views, for example when a user enters the homepage we want to show all blog posts, when user clicks on a single blog post we want to show a view which will render a single post. The view is some kind of HTML but it doesn’t contain any data, it just describes how HTML file should look like. For View layer JSP and Thymelaf are most popular choices with the latter one being younger and more friendly to use. I recommend using Thymeleaf for your view templates. I used it in the AppointmentScheduler project, here you can find all views that this project uses. You can see that they have *.html file extension and are similar to HTML files.
Controller - This is some kind of coordinator, it receives requests, prepare data and join it with a view and as a result outputs a ready HTML file to the client
Flow of request
Let’s look for simplified request flow and divide it into some logical parts, then we will dive into each one and see what libraries/technologies we want to learn. When a user enters a URL and hits enter a new HTTP request is made. This request goes to webserver on which your application is hosted. Then your webserver passes this request to the appropriate Servlet. In Servlet you can call your database to retrieve your data (model) and then return the view name to which the model should be binded. Then your model will be joined with a view and the response will be returned. I simplified this as much as I could just to highlight the most important things that you have to know understand:
HTTP protocol: Before you will start writing web apps it’s essential to know how web apps work and all the basics related to them. You should know what happens when you type a web page address in your browser and hit enter. How a request is made, what are available request and response headers, what it means if the server returns status 200 for your request, or what it means when it returns status 500. You should know all available HTTP methods and understand the difference between them, like what is the difference between POST and GET. You should know what are request params and request body and when you can use which. These are all basics and please don’t go any further if you don’t recognize things which I just mentioned. Here is a good introduction which I recommend to get familiar with HTTP.
Webserver - This is self-explanatory I think. Tomcat is one of the servers on which you might run your Java application. At this point you don’t need to know much about servers, you just need to know that Tomcat is needed to run your application. Tomcat is also called a Servlet container.
Servlet - This is something that you should definitely read about and play with. Basically, it is an entry point to every HTTP request in Java app, no matter if you use Spring or not (this is something that Spring also uses under the hood). Before learning any web framework like Spring I suggest making a simple web app with just servlets and JSP (please check point 1.5). That will help you understand what happens at a low level.
1.5 Data Storage
As you probably already guessed to have a dynamic site we need to have storage for our data so we could save this data and read it at any point in time. For this, we need to have a database and know how to connect to it.
Database
This is a huge topic and this whole blog post could be just about databases. For the beginning, you need to choose one database type and learn the basics about it. I recommend choosing a relational database, either MySQL or Postgres. These two will fit the most scenarios for you and are also very popular in job offers. Treat this step seriously and spend some time on it. Find a long course or buy some book. There are a ton of resources. Make sure that you understand basic DB concepts like ACID, SQL vs NOSQL, transactions, secondary indexes, joins.
JDBC
Now you need to connect from your java app to your database. For this purpose, you will have to use something called JDBC (Java DataBase Connectivity). Please read a little bit about it but I would not dive too deep into it. Later you will work on a much higher abstraction level and actually don’t need to know much about it. It’s just for the purpose of knowing how things work under the hood.
1.4 Maven
To build even a very simple web application in Java you will need some build tool that will make your life easier. It will fetch your external dependencies from the central server so you don’t have to do it manually. It will also help you to build and manage your project. Try to spend some time to understand basic concepts because you shouldn’t go to the next steps without knowing how it works. You can also learn Gradle instead of Maven, try to do your own research, and decide for yourself.
1.5.Write 1st Java app (Servlets + JDBC + MySql/Postgres + JSP/Thymleaf)
Finally! Now you should be familiar with core Java, Maven, HTTP protocol, MVC Patten, Servlets, MySQL, JDBC, and JSP/Thymeleaf. That will allow us to create a very simple, “low level” dynamic website. I recommend you to create a very simple CRUD app with the mentioned technologies. Nothing complicated, as I said the purpose of this project is to show you how the simplest Java web app without any big external frameworks might be done, it’s should be as simple a possible but it should use all of the mentioned technologies and handle CRUD operations. Books Management tutorial is a perfect example of what I mean. Try to recreate it or even better do your own, similar one.
If you did it then accept my congratulations! Now you know how people did web apps in Java 20 years ago! :) But trust me that your time was not wasted and you will benefit from that knowledge even though you will not use it in your job directly.
Now if you would continue extending this project by adding new features you would find that it’s getting messy and it’s harder to maintain with every new feature. I highly encourage you to do it. Try to add some features like your own, very naive auth system, or the possibility to list all books by a given author or sorting records in a table by title. You might end up (and that’s nothing bad) with some spaghetti code which you will not understand at the end. That’s why we need to learn things from Part 2.
Part 2
Modern approach to write web apps in Java
So the purpose of whole Part 1 was to show you how to do it the hard way. Now we can identify some parts which were painful and try to help ourselves a little bit. Let’s discuss what we can improve based on the Books Management project.
2.1 Spring
You probably already heard of this, most people will tell you that the next thing after learning Java should be learning Spring. What is Spring? It’s even hard to say in a few words what it is for newcomers and I think it’s best described by its authors on Spring Framework Overview page. Did you read it and still don’t feel it? Don’t worry! To be honest you may still not understand what it really does so you just need to read a book about it or take some course to fully understand it. This is why we created our app the hard way in Part 1. Now that knowledge will help you to understand what problems Spring solves for you.
When it comes to resources to learn Spring I highly recommend this Udemy course Spring & Hibernate for Beginners (includes Spring Boot), this book Spring In Action and of course Spring Docs.
I also want to make you aware that there are a lot of books that still use XML configuration and don’t use Spring Boot. You need to know that only very old, legacy apps use XML config so don’t spend too much time on this approach. Every modern app uses an annotation-based config so focus on this way on configuring your app. There is also Spring Boot which was created because Spring itself is so complicated that it needed a configuration framework :) It auto-configures a lot of things for you and generally makes your code less complicated and your life easier. You should definitely use Spring Boot but I think you should not start with it. Start with Spring Core, Spring MVC, and at the end switch to Spring Boot.
When you will learn Spring you will see how much you can simplify point 7. “Coding Controller Servlet Class” and point 4. “Coding DAO class” from Books Management project. That will be something very satisfying for you, trust me!
2.2 ORM, JPA, Hibernate
I said that you will be able to simplify your point 4. “Coding DAO” from the Books Management tutorial after you learn Spring. That’s true but one of the reason why Spring is able to simplify it is because it uses something called ORM (Object-Relational Mapping). And this concept is so important and big that it deserves its own section. Please take a look one more time at what we had to do in order to select all records from the Books table and map them to Book class using just JDBC:
    public List<Book> listAllBooks() throws SQLException {
        List<Book> listBook = new ArrayList<>();

        String sql = "SELECT * FROM book";

        connect();

        Statement statement = jdbcConnection.createStatement();
        ResultSet resultSet = statement.executeQuery(sql);

        while (resultSet.next()) {
            int id = resultSet.getInt("book_id");
            String title = resultSet.getString("title");
            String author = resultSet.getString("author");
            float price = resultSet.getFloat("price");

            Book book = new Book(id, title, author, price);
            listBook.add(book);
        }

        resultSet.close();
        statement.close();

        disconnect();

        return listBook;
    }
Generally what we do here is we are mapping records from the database to Java objects of type Book. But in order to do it, we had to extract each column name from the result set for each record and manually create a Book class for every record. This is a very common task and we can use ORM solution like Hibernate for this task. With Hibernate the same code would look like this:
public List<Book> listAllBooks() {
    return session.createQuery("SELECT b FROM Book b", Book.class).getResultList();
}
Do you see how much it is simplified? Wow! But where it really shines are situations when you have a single class that has data spread in multiple tables. In our case, all data required to create a Book class were in a single table. You can imagine that our Book class has an additional field called ‘reviews’ which is of type List<String>. We can have a second table in our DB where we will store reviews for books. Then when we will fetch a Book class what hibernate will do is it will query two tables, books, and reviews and will join these data into one class called Book which will have all required data. Of course to make it work you will have to annotate your fields in model class with appropriate relation annotations like @OneToMany, @ManyToMany, etc. That’s why apart from learning Spring you have to learn Hibernate. You need to know how to create your models and what relation annotation to use so that Spring could do its magic.
There is also something like Spring Data which is able to generate methods for you! You just have to create an interface that extends CrudRepository and that’s it! Spring will auto-generate CRUD methods automatically!
To sump up, you should study and understand these concepts:
ORM - The idea of taking java objects and mapping them to a data store. You can have a single class that will have data stored in two different tables.
JPA - This is a specification for ORM in Java. There might be many implementations of this specification
Hibernate - It is one of the implementations of JPA
Spring Data - It adds another layer on top of Hibernate. You have already seen how much Hibernate simplified our function to fetch all Books. What Spring Data does is even more. It generates methods that underneath use Hibernate. It significantly reduces the amount of boilerplate code in our project. We usually always need a method to fetch all records right? And spring data knows how to generate such method.
Most likely you will be using Spring Data most often in your applications. But before you start using it you have to understand all the concepts. Spring Data is the solution which I used in AppointmentScheduler project, here you can find different interfaces for various data types which I needed.
2.3. Source control and Git
Knowing Git is a must-have nowadays. There’s nothing I can say about it. Just search for some short courses about it and learn it. Don’t dive deep into it. Most modern IDEs, especially Intellij have very nice GUIs for git. You just need to understand the most important concepts like how to checkout new branch, how to commit changes, how to fetch changes from a remote branch, how to resolve conflicts during merge, how to push changes to the server, how to compare branches. I want you to learn git before you will jump to the next chapter because your second application should be written with it. Our second application is something that you might want to show to other people and you should use git and GitHub for this purpose.
2.4. Write 2nd Java app (Spring Boot + Hibernate/Spring Data + MySQL/Postgres + Thymeleaf/JSP)
Now you know what you can improve and you can write your second project, this time with the help of Spring and Hibernate. Actually, at this point, you can create a really complex project and only your imagination is the limit. When I was at this stage I did a project called AppointmentScheduler. Try to use all technologies which I already mentioned. Ideally would be if you use Spring Boot, Spring Security, Spring Data, MySQL, Thymelaf. Try to make it on your own and don’t follow any tutorial. Think of what could help you/your friends or try to clone some existing apps but don’t follow step by step tutorial which creates the whole project, you have to encounter problems. The more the better. Then you have to find solutions to these problems (StackOverflow is your friend) by yourself. Don’t afraid that your application is not aligned with all the best standards and is not perfect. I was afraid at the beginning that I don’t know all these good practices, naming conventions, project structures, etc, and literally, I was afraid to write code because of that. You just have to do it, you need to make all these beginner’s mistakes and this is the only way to learn and improve in the future. It’s impossible to start writing good code from the beginning.
Part 3
3.1 Design Patterns and Data Structures
Now you should have some pretty complicated app that is full of bad practices! And that’s actually not bad, that’s not production and critical application. That’s your pet project and its purpose is to help you to learn. Now when you know all the tools and did your first mistakes you can focus on improving your code quality and architecture. For this, you need to learn Design Patterns and Data Structures.
Fortunately, most of the mistakes and problems which developers encounter in their day to day job are very common and were already solved many years ago. Solutions to these problems are called Design Patterns. I think it’s good to first make some mistakes and then read design patterns to see what we did wrong. Maybe you already solved some issues with some design pattern without even knowing it, if that’s true then congratulations :) If not, that’s nothing bad. To give you some examples, you might have some class that expects many arguments in the constructor but not all arguments are always needed. In that case you can use the builder pattern. You may sometimes want to have a simplified interface for a complex set of actions, then you might use Facade pattern. All these patterns are very well described in Head First Design Patterns book which I recommend to read.
Another thing that is a must-have for you is the knowledge of data structures. I don’t want you to take some 6 months academic course full of theory but you should know which data structure to use when you want to retrieve an element from a collection in constant time (ArrayList) or which data structure to use when you want to have constant time for inserts (LinkedList). If you don’t have too much time for this topic, I recommend this HackerRank’s short course which covers all the most important structures.
3.2 Tests
It is important to make sure that your features are bug-free and that when you will make changes to your code you will not break anything. That’s why you always need tests. You should know what kind of tests there are, that we have unit tests, integration tests, e2e tests… Try to study these concepts. When it comes to Java there are two must-haves: Junit and Mockito. I’m not gonna dive into these things, just google them, learn them, and remember to add tests to every project you make.
3.3. Messaging systems and JMS
This is something that will be not frequently used in your own small projects but it is something that most likely will be used in your job and will be required during interviews. It is applicable to big projects that need to handle a lot of traffic, usually in a micro-services architecture. It allows you to easily exchange messages asynchronously between java applications. This is so important that Java created an API for it called JMS. There are two main concepts which you need to understand: topics and queues. There are many implementations of this API, the most popular are ActiveMQ and RabbitMQ. I recommend picking one of these apis and creating two java applications that send messages through topic and queue between them. One being a producer and the second one being a consumer.
3.4 Websockets
Most scenarios will be that your client (web browser or mobile app) asks your backend for data with an HTTP request. However, sometimes you might want to reverse that. Sometimes you need your server to send data to your client even though the client didn’t ask a server for it. This will be needed when you will want to create a chat application. In that case, your client should just have an active web socket connection and wait for the server until it sends something to it. Another scenario will be the implementation of some kind of notification system like you have on Facebook to notify your client whenever something happened. For all these features you will have to learn about Websockets and STOMP protocol. The good news is like almost everything it is implemented in Spring and Spring provides high-level abstraction for that.
3.5 REST API
You should learn what is REST API, what are the requirements and what are good and bad practices. Here I’ll try to explain it with a simple example that is aligned with this blog post. What we did so far is that we created a web application that contained controllers, models, and views. When we make a request we receive HTML code as a response. We had to declare templates for view and with the help of JSP or Thymeleaf when we will fill those templates with a model they are converted to HTML pages and returned by controller. We can change it. We can just return raw data from our java application, like blog posts list in JSON format, and don’t implement any view. Our response to list all blogs post request instead of being an HTML page can be a JSON which might look like this:
[
    {
    "title": "Title of post1 1",
    "author": "Author of post1"
    },
    {
    "title": "Title of post2",
    "author": "Author of post2"
    }
]
This approach gives us a lot of flexibility. Imagine that apart from having a website for our blog we want to create an android app that will need to fetch all blogposts. Then we can create two clients:
-
React/Angular application which will be calling our java application and will receive json and convert that json to html view
-
iOS/Android mobile application which will be also calling the same java application and will also receive json and convert that to whatever view it wants
That gives us a lot of benefits. We just need one java application that serves data for two different applications. Apart from that, we separated server code from client code, we don’t need those JSP/Thymleaf templates anymore, we can just focus on raw data. In fact most web applications in Java today are REST apis without any view templates so I hope you understand how important it is to know this concept. The view layer for web apps is usually done in React/Angular and these client apps just fetch data in JSON format from java aps.
3.5 External REST APIs
In point 3.4 I said that one of the biggest benefits of REST API is the fact that you can have multiple clients which might be written in completely different languages/platforms. Because of that fact you should be aware that your server application can be a client to other server applications (REST APIs). Today there is an api for almost everything. Would you like to create invoice? Don’t do it on your own, call external api which will do everything for you. Would you like to send some email message to 100k of users? Don’t do it yourself, type in google “mailing api” and pick something. The main idea is that it’s essential to know how to consume external REST API in your application. RestTemplate class from Spring framework will be your best friend here. If you learn yourself how to integrate with external apis then you will realize that writing new application might be as easy as putting few different apis together in one application.
3.6 Write 3rd Java app (REST API + all learned technologies)
Now you should write an application that will be a REST API. You can create a new one from scratch or you can take your project from point 2.4 and delete all views. Now you know a lot of design patterns, try to use them consciously and as many as possible in this project. You also learned about tests, don’t forget to add them as well! Also remember to apply all good REST API practices like how to structure your resources paths, what status codes you should return on different scenarios etc. There are many resources on these topics that you can find online. You can also look at how other APIs are designed, like GitHub API or Google Maps API, and try to follow their approach. Remember that this project might be a good position in your CV so do your best!
Summary
Unfortunately, we just talked about the basics of java backend development. There are so many other things that I would have to write a full book just to list out all the concepts. However in my personal opinion if you will learn all things mentioned above you should be a perfect candidate for a junior Java developer. When it comes to what you could learn next I think that when you will learn all this stuff you will be on a level when you will know yourself what you need to learn next.